Control a Neopixel/WS2812 Ring via the Internet using the ESP8266
The moment I learned about the new ESP8266 microcontroller, I was very curious to build something with it. A small microcontroller that has wifi support and a strong processor is just too good to be true. The first device I decided to build was a, I call it internet mood box, thing where the colors can be controlled via the internet. This way anyone can send a color to the actual physical device and this color will show for a while. As I made this mood light for Julia, much of the names you will see is Julia :).
General Setup
The general plan was to have a webpage where you can set the color and a local device that is connected to the internet, receives the color commands and turns on a Neopixel/WS2812 ring accordingly. To program the ESP8266, I chose to use the Arduino ESP8266 core. That allows to natively run the script on the ESP8266, so no additional controller is needed. Plus I am already familiar with Arduino.
Web Page
There are actually many different ways to accomplish that and I also experimented with different ones. There will be a second blog entry soon that describes an alternative solution. In the end I modified the approach described here. They did much of the heavy lifting on how to parse data from a web page. Basically what is happening, the user selects a color (using the jscolor javascript plugin) and this color is written into julia.json file that looks like this:
{“red”: “147”, “green”: ” 107″, “blue”: ” 255}
Initially, I thought about submitting the hex colors directly to the ESP, but decoding this into RGB proved quite difficult. In the end this was much easier to do this via PHP.
ESP8266
Since the ESP8266 has wifi support, getting data from the internet is straightforward. I just hard-coded the SSID und password of my wifi network and had internet access. Then I send a HTTP GET command in order to retrieve the content of julia.json. The received file gets parsed and the three color values are extracted. Once the color is retrieved the Neopixel ring starts rotating with those colors.
Connecting the ESP8266 was actually also quite easy. I used an ESP8266-07, if using a different version the connections might be slightly different (in particular GPIO15 is internally wired) There are very few additional parts needed in order to make it work. The connections were (left side is ESP8266):
- GND -> GND
- VCC -> to 3.3V
- RX -> TX serial programmer
- TX -> RX serial programmer
- GPIO15 -> 10k Ohm -> GND
- RST -> 10k Ohm -> VCC
- GPIO 2 -> 10k Ohm -> VCC
- GPIO0 -> 10k Ohm -> VCC
- Via switch to GND (to set bootloader mode)
- CHPD (enable) -> VCC
- GPIO 13 -> 500 Ohm -> Neopixel
As I wanted to power the whole thing off USB (a 5V source), I did a quick and dirty thing of putting two diodes in series to reduce the voltage. This put the voltage into the correct range and so far worked without problems. At this point I run both the Neopixel and the ESP8266 off the reduced voltage. In the next iteration I would probably only use one diode for the Neopixel, giving them some more voltage to work with.
The bad
Once a color is received, I set a timer, so that the Neopixel only shows this color for a limited time and then turn off again. This prevents the ring to be on forever (something I did not want). The trigger to light up again is if the color in julia.json did chance, if the parsed color is the same as previously the ring does not light up. This way I can tell if a new user input was given and turn on accordingly. The big disadvantage is that one cannot send the same color again. Additionally, there is no feedback on the web page if the device is actually working and one can only hope if the color is actually showing.
Physical Device
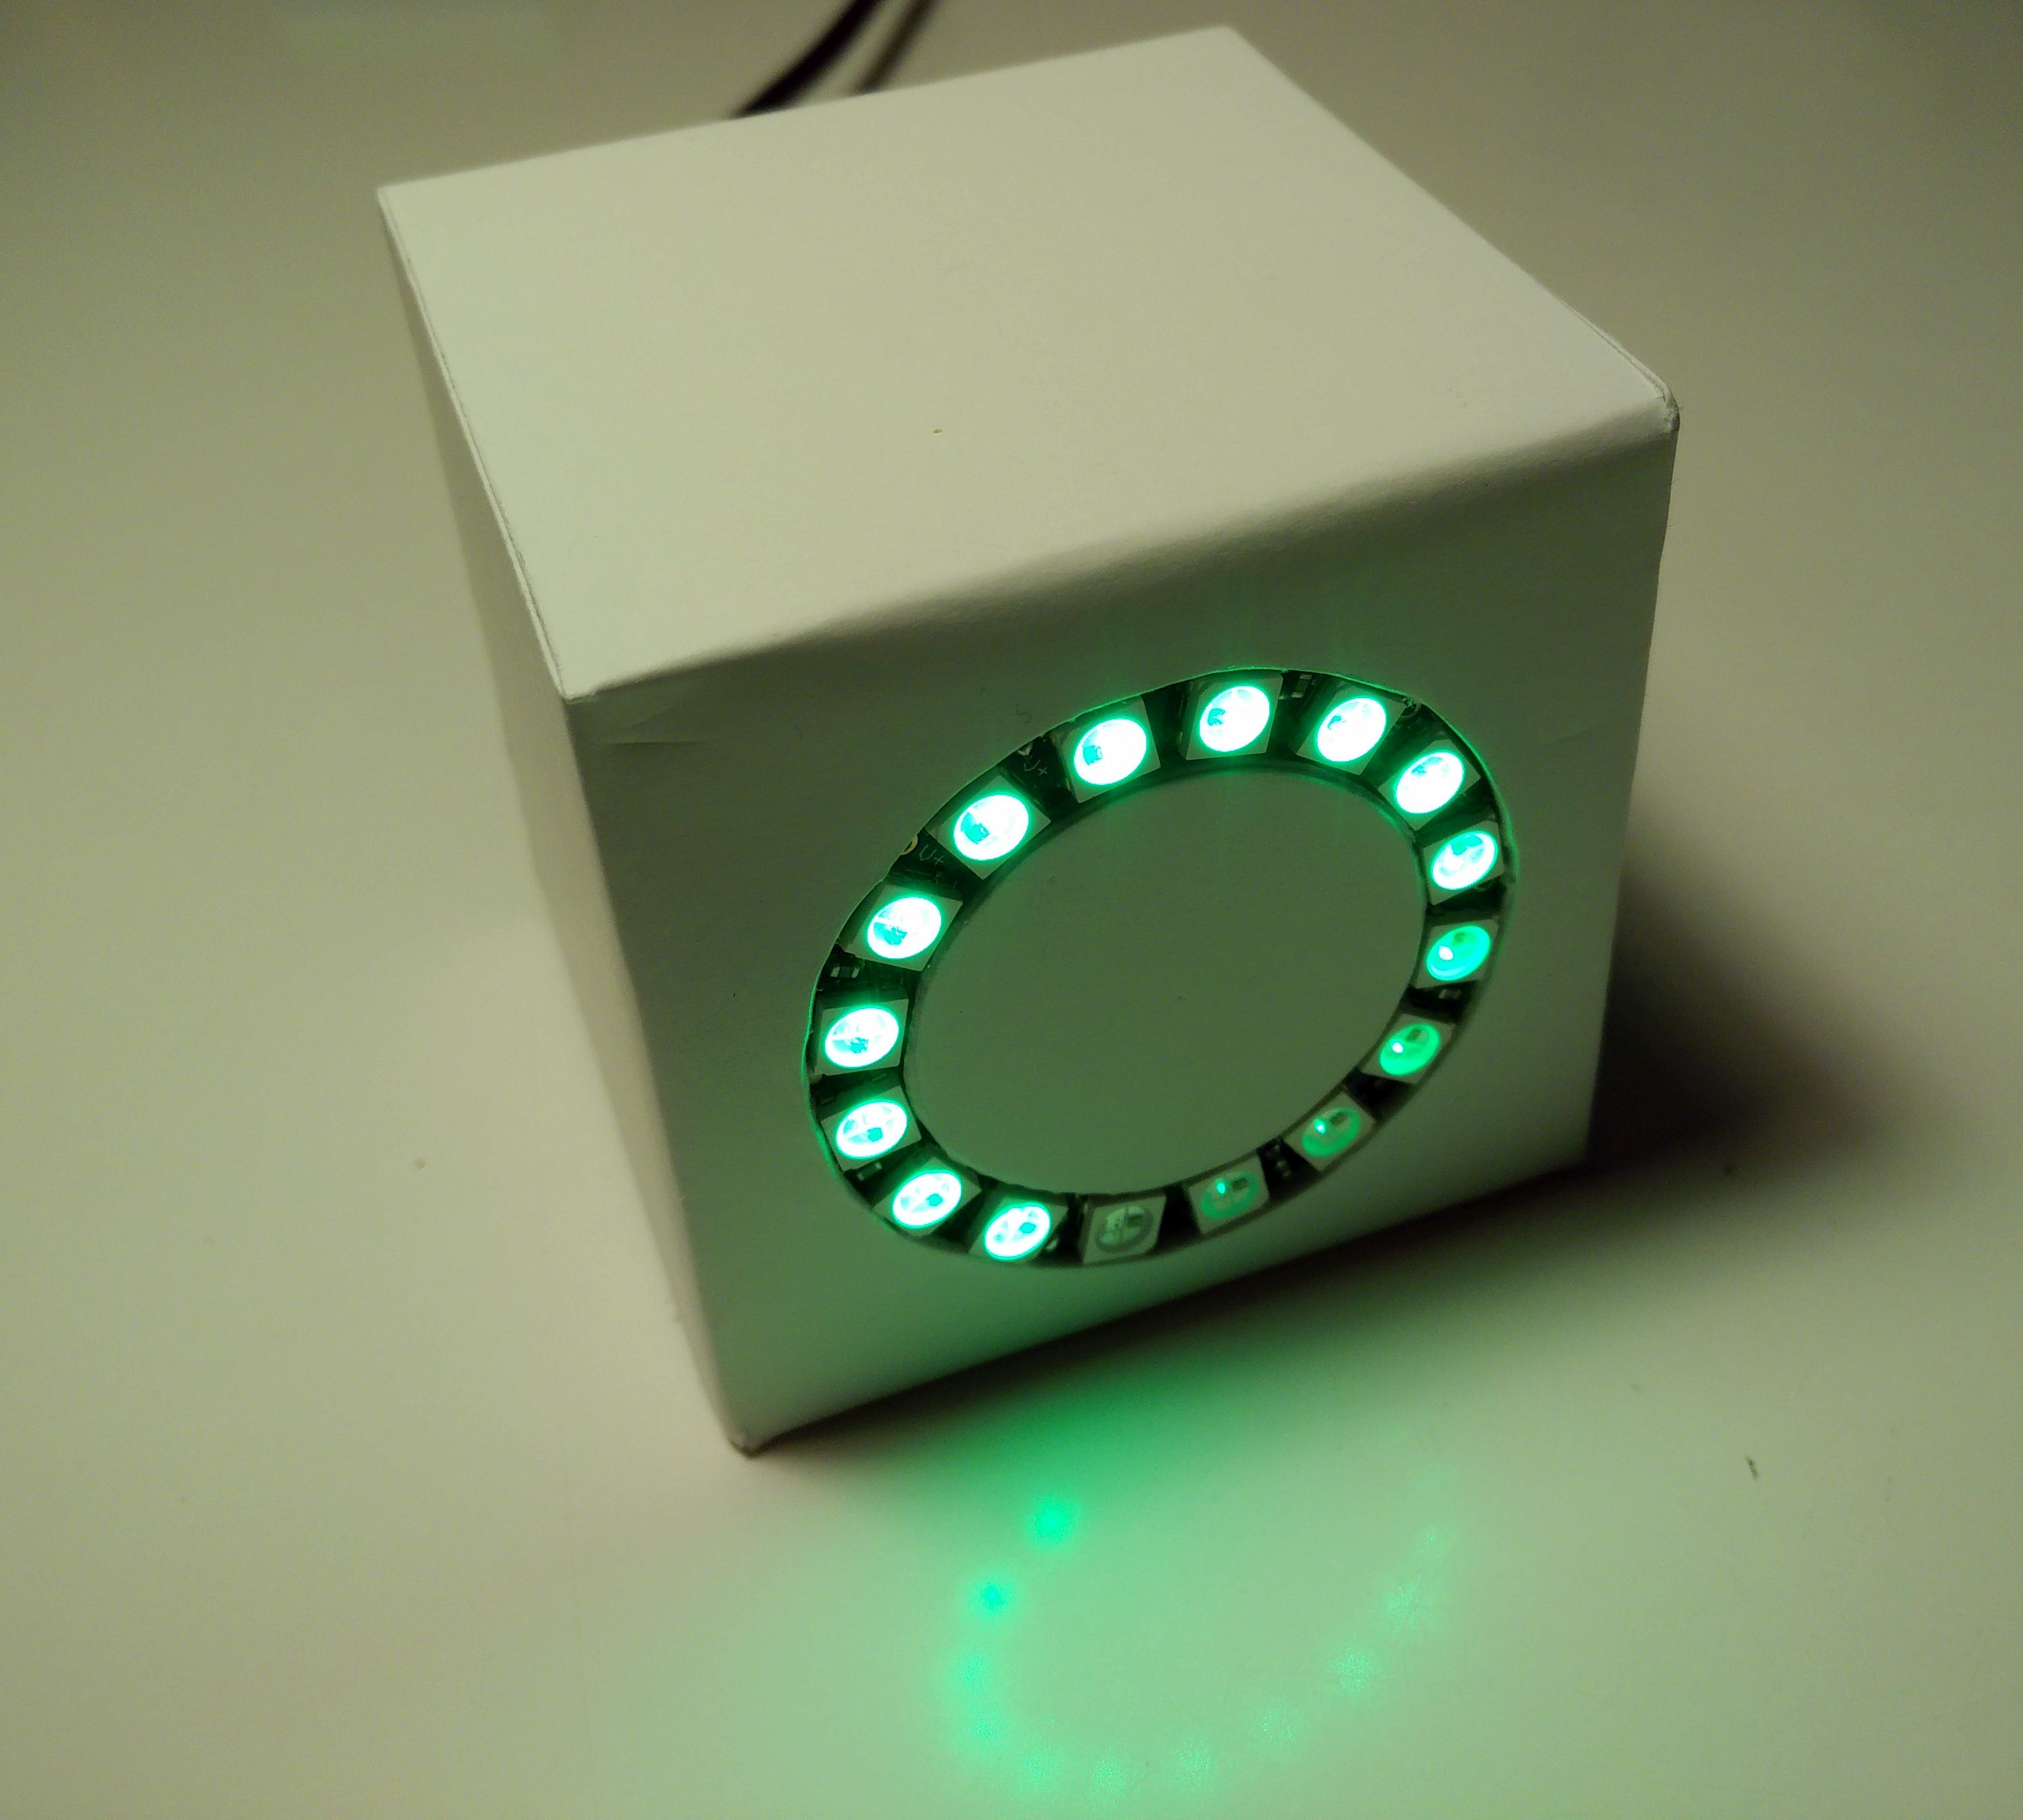
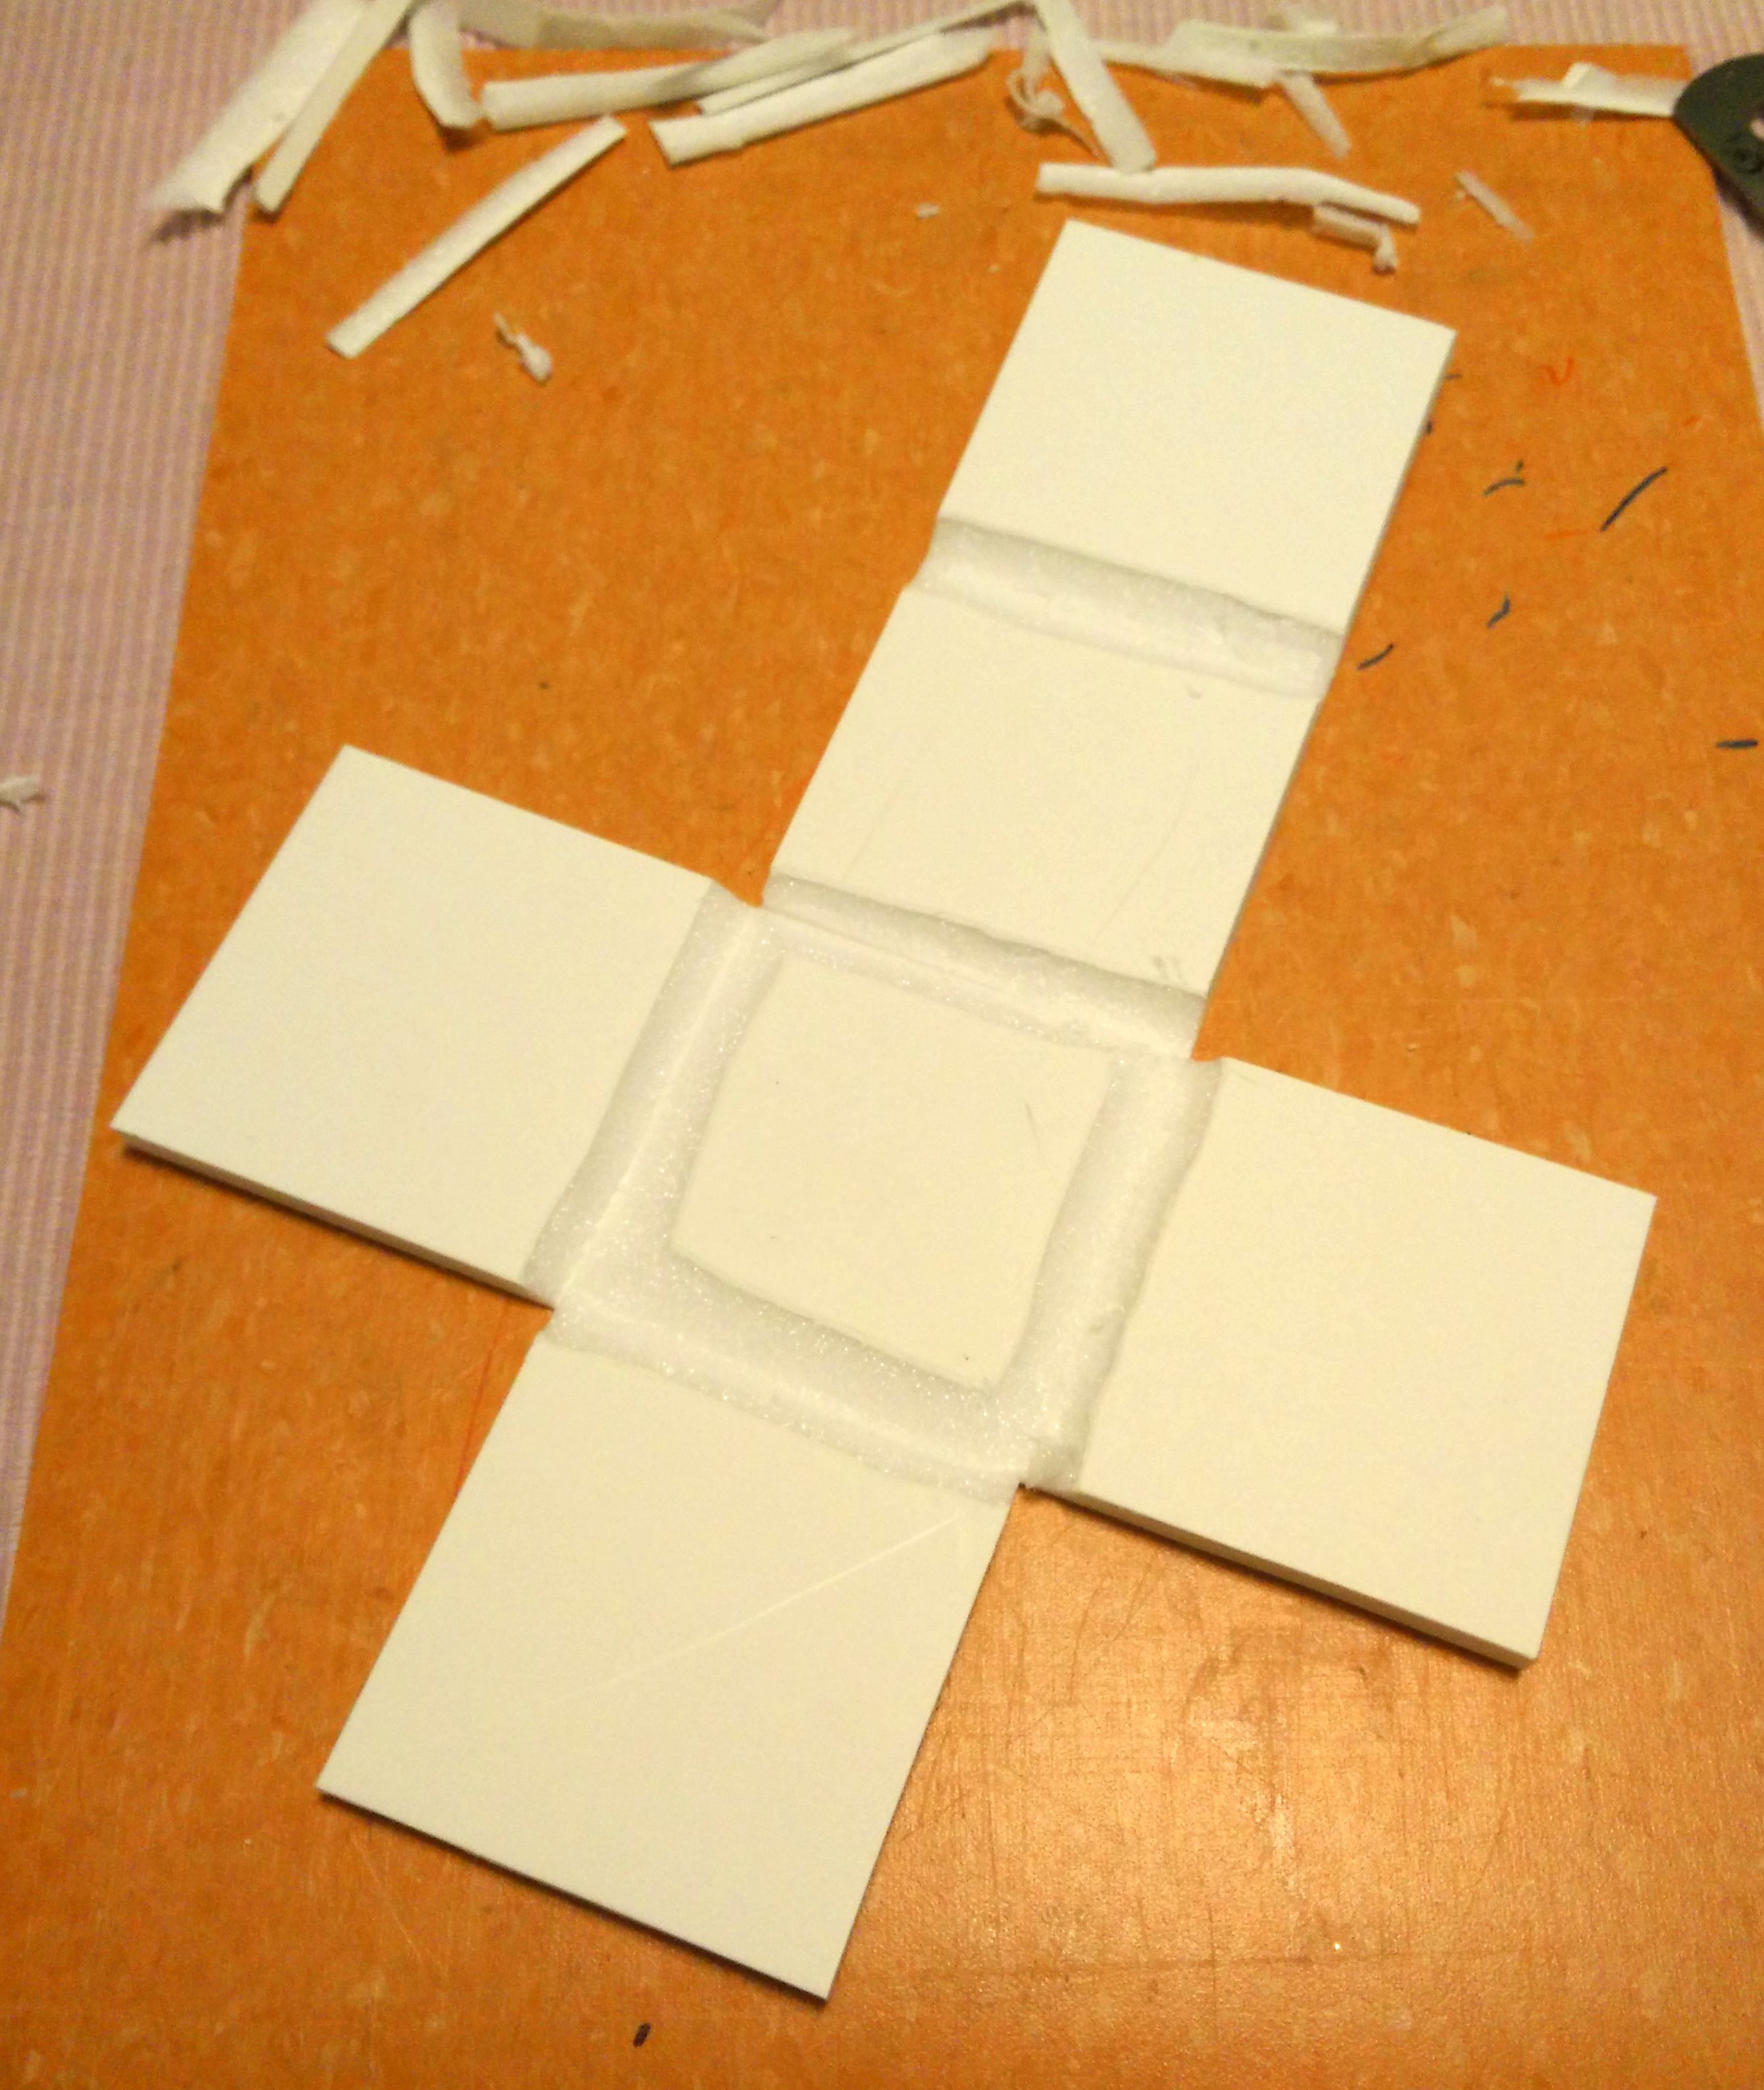
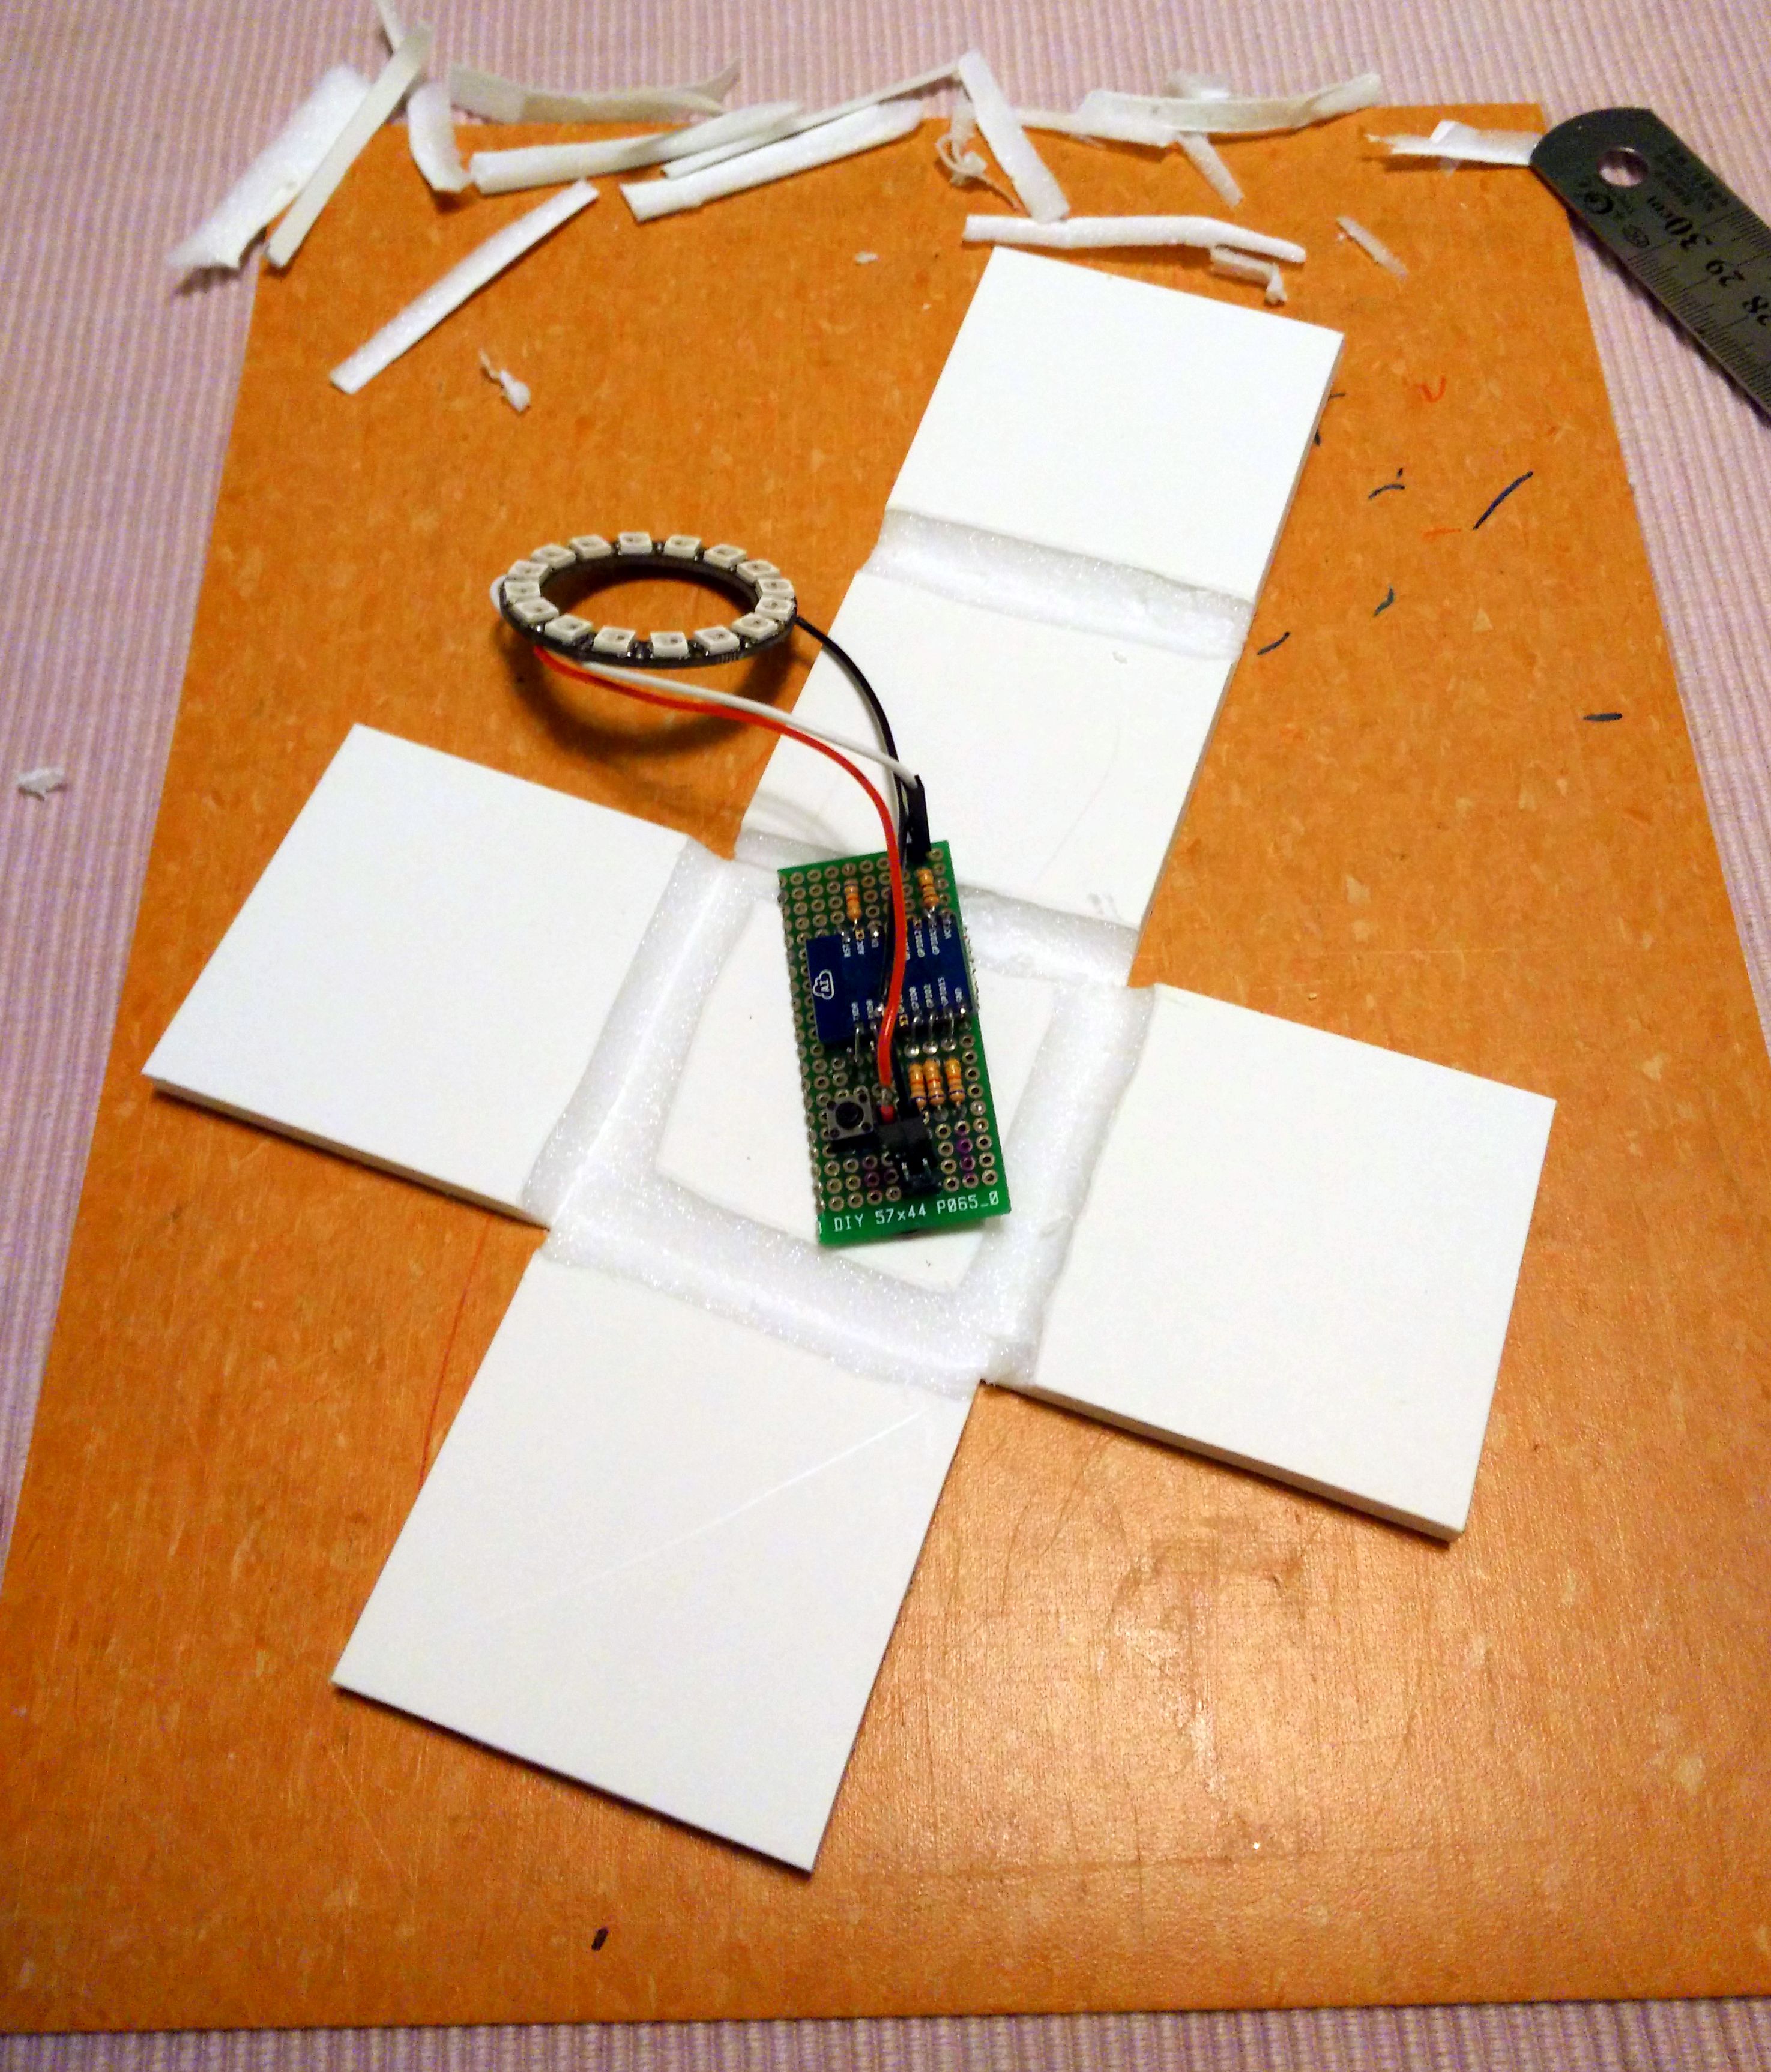
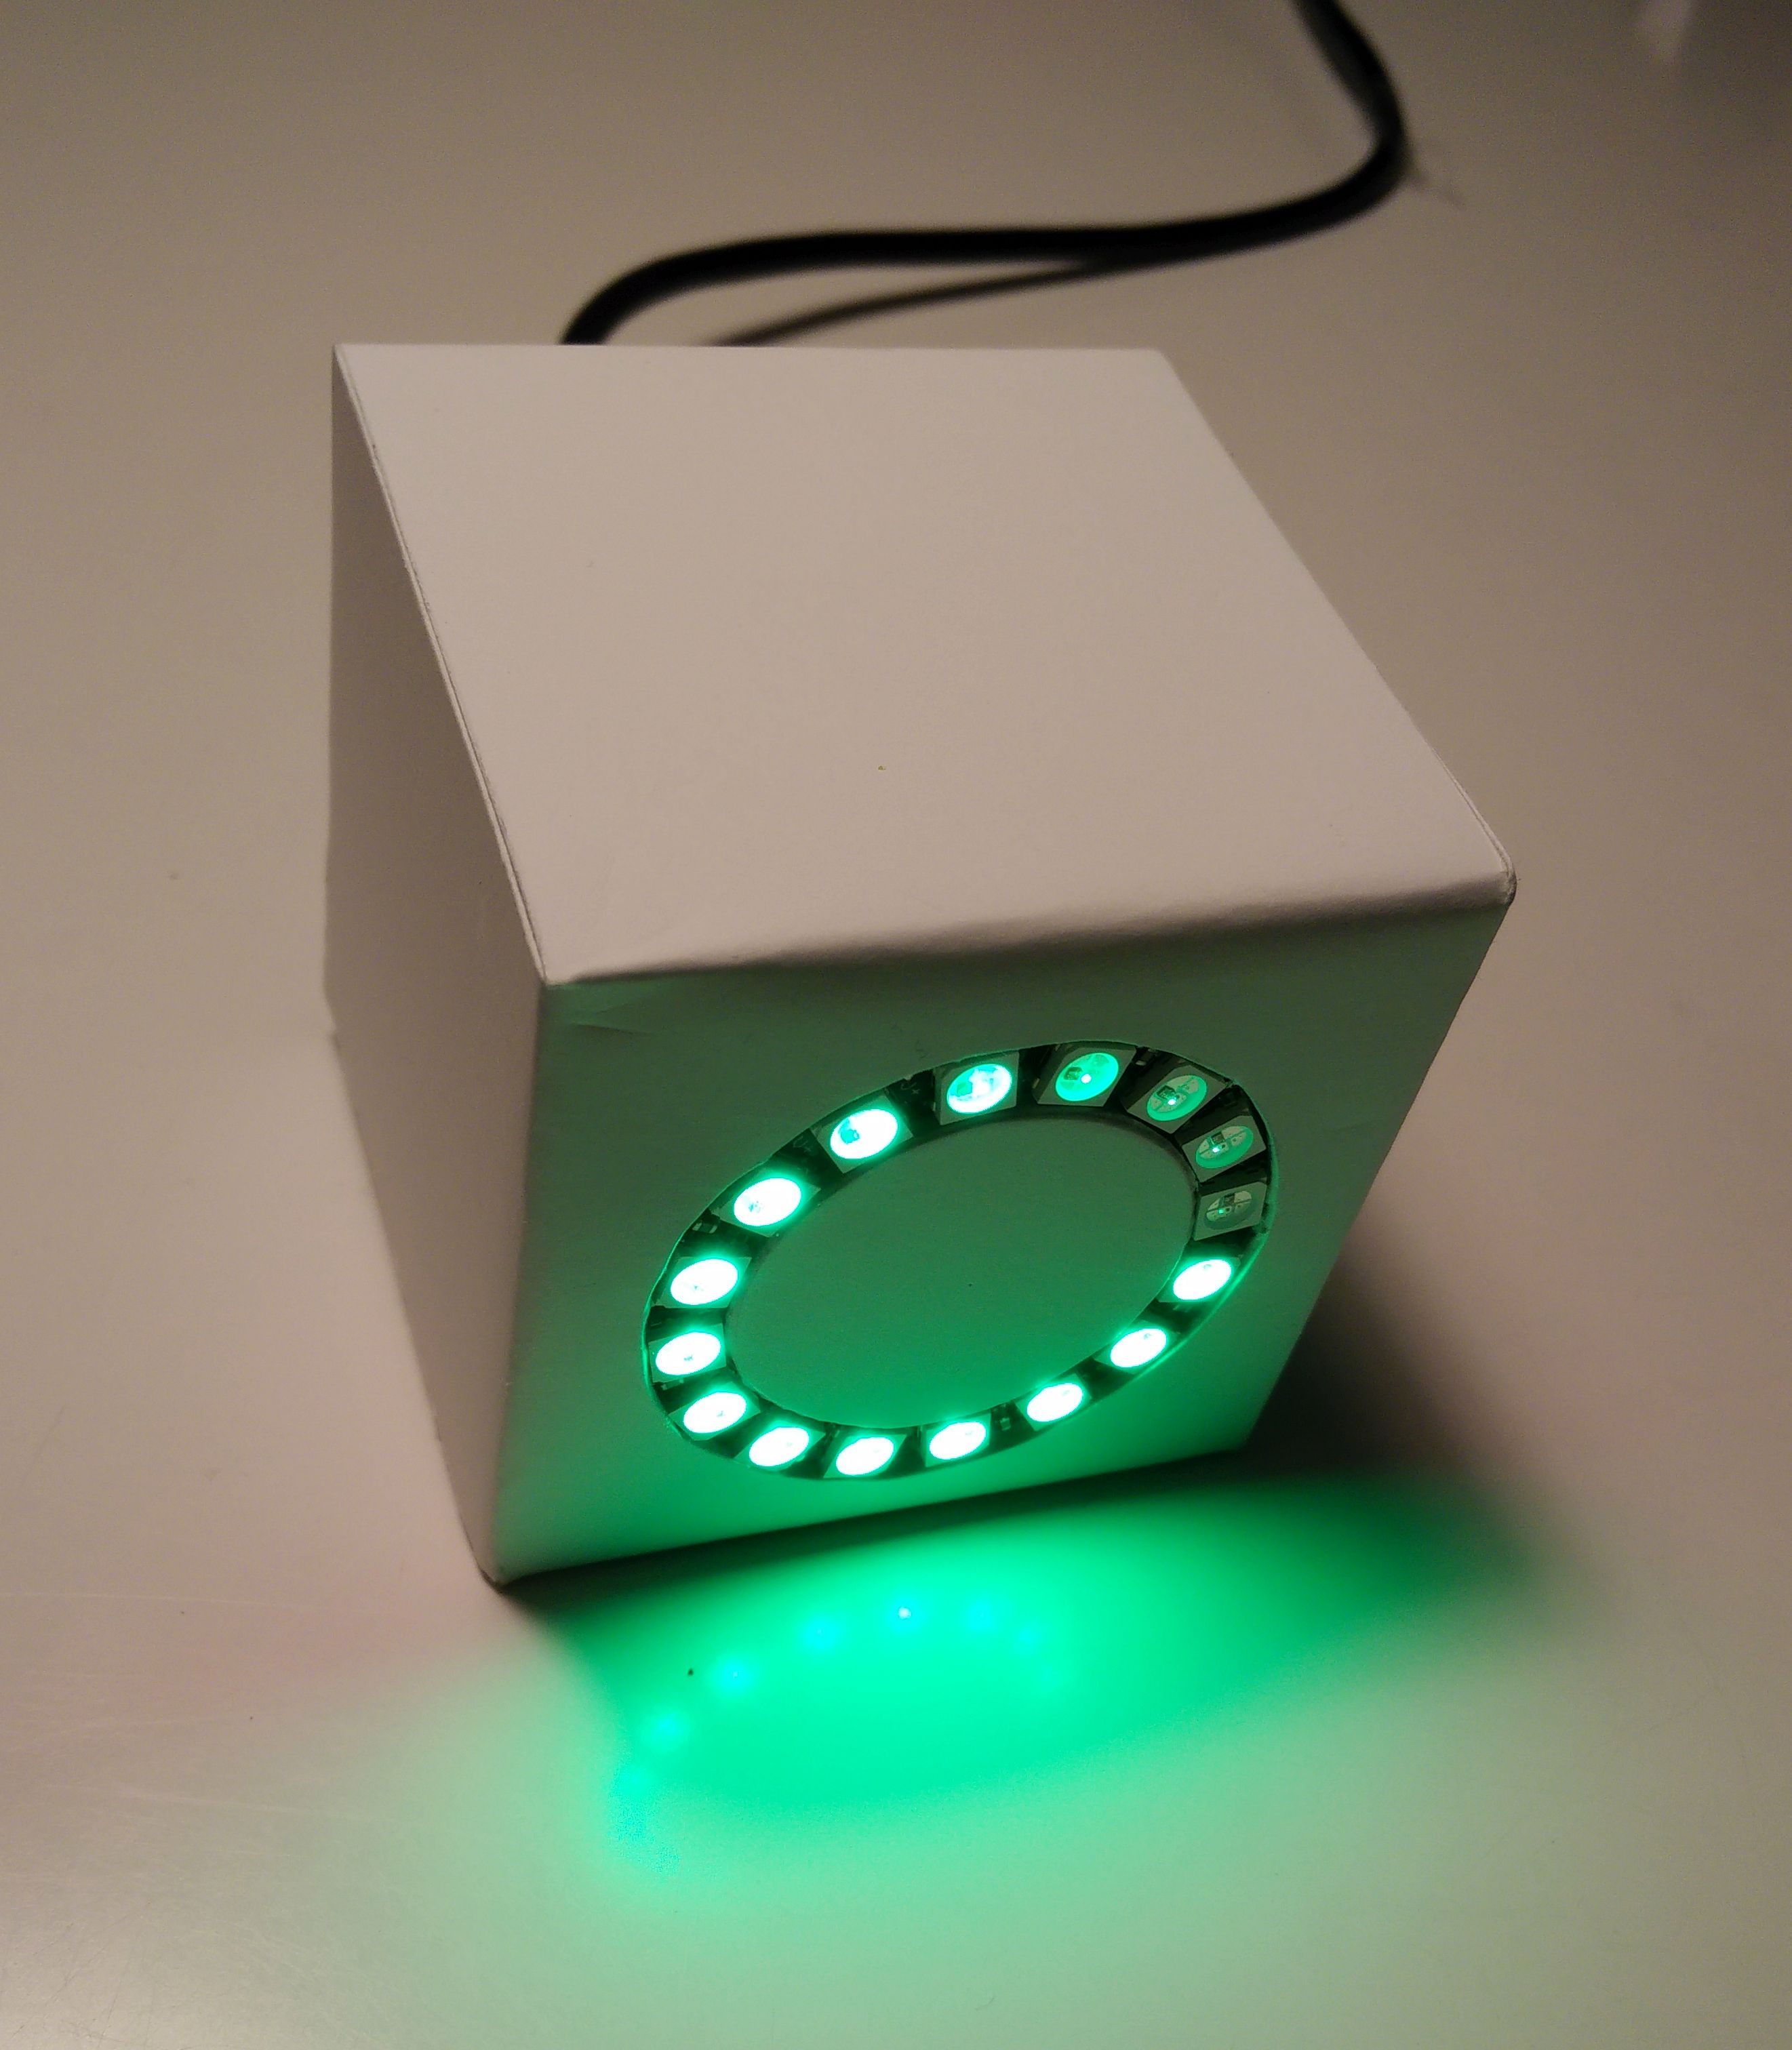
Using the connections outlined above, I soldered all together on a single PCB board. I kept a couple of connectors, so that I can reprogram the ESP8266, if needed. To create the Internet Mood Light, I used white foam board and made a cube out of it. It took a bit of time to cut it, but in the end it was not too hard.
This is the cube layout. In order to bend the board, you have to cut away all but one paper side and make 45 deg plus v-shaped cuts.
And this is how the cube looks halfway done. I cut a circle in front for the Neopixel ring and then hot glued it in place.

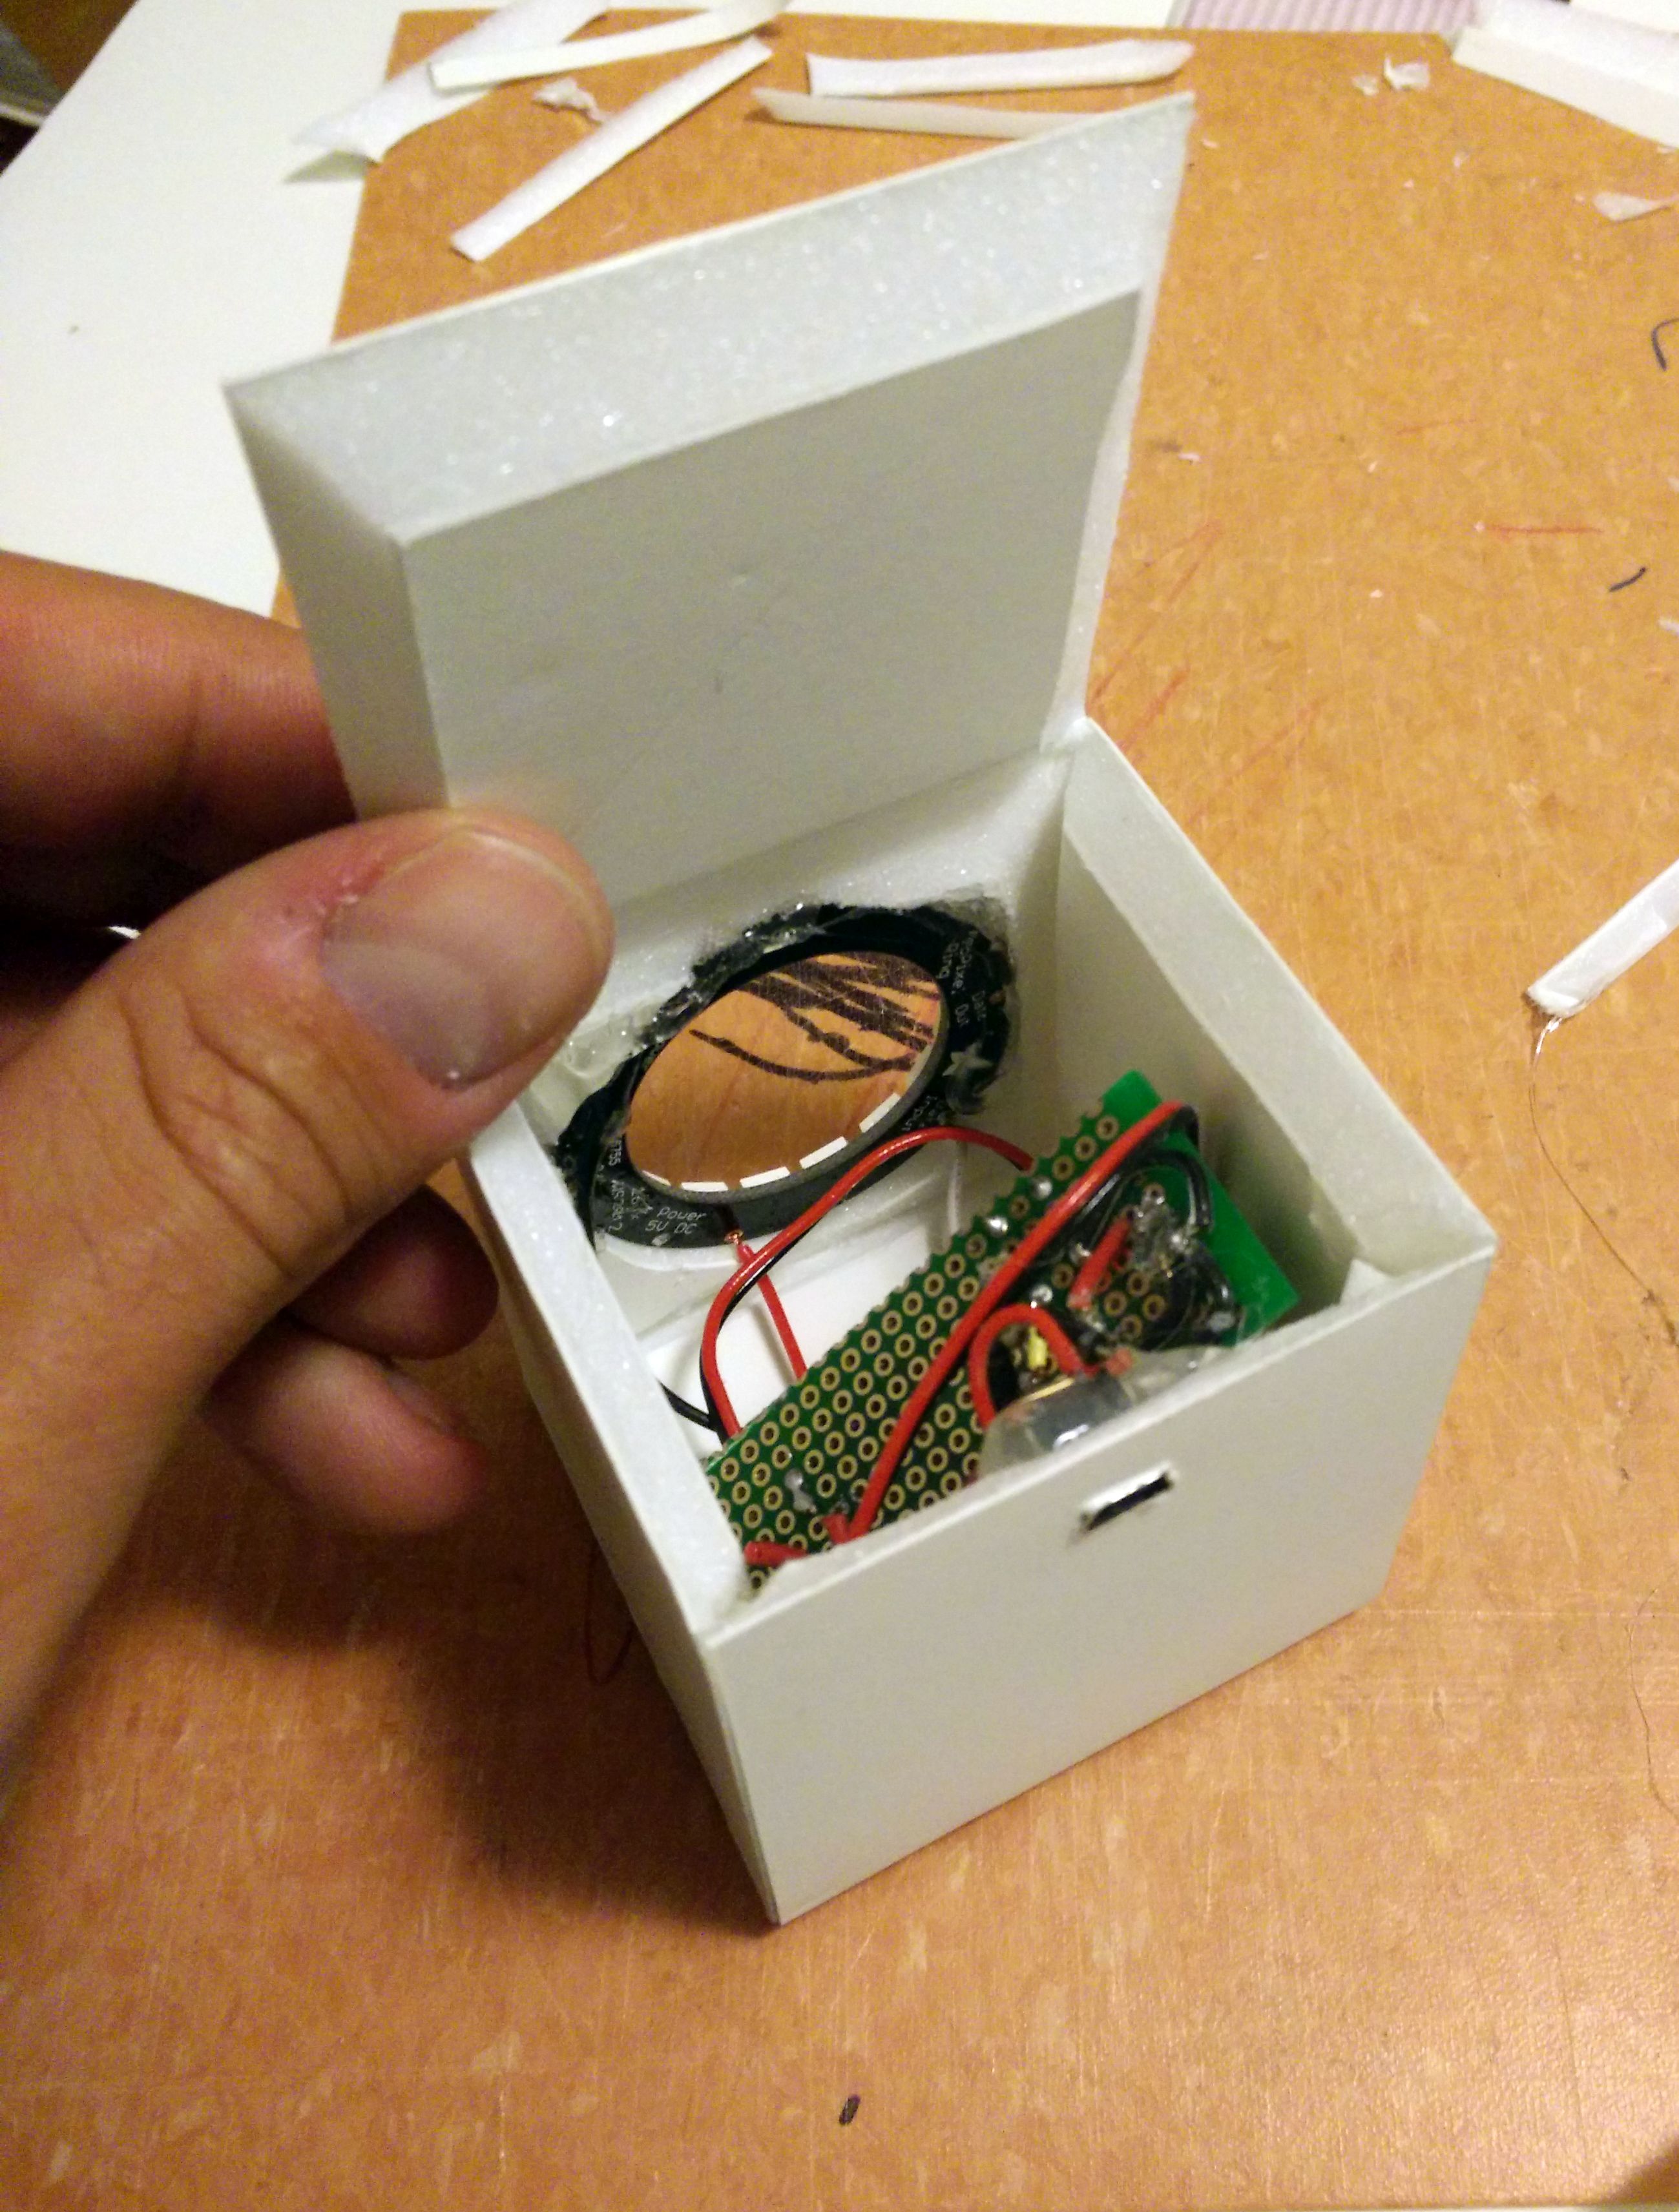
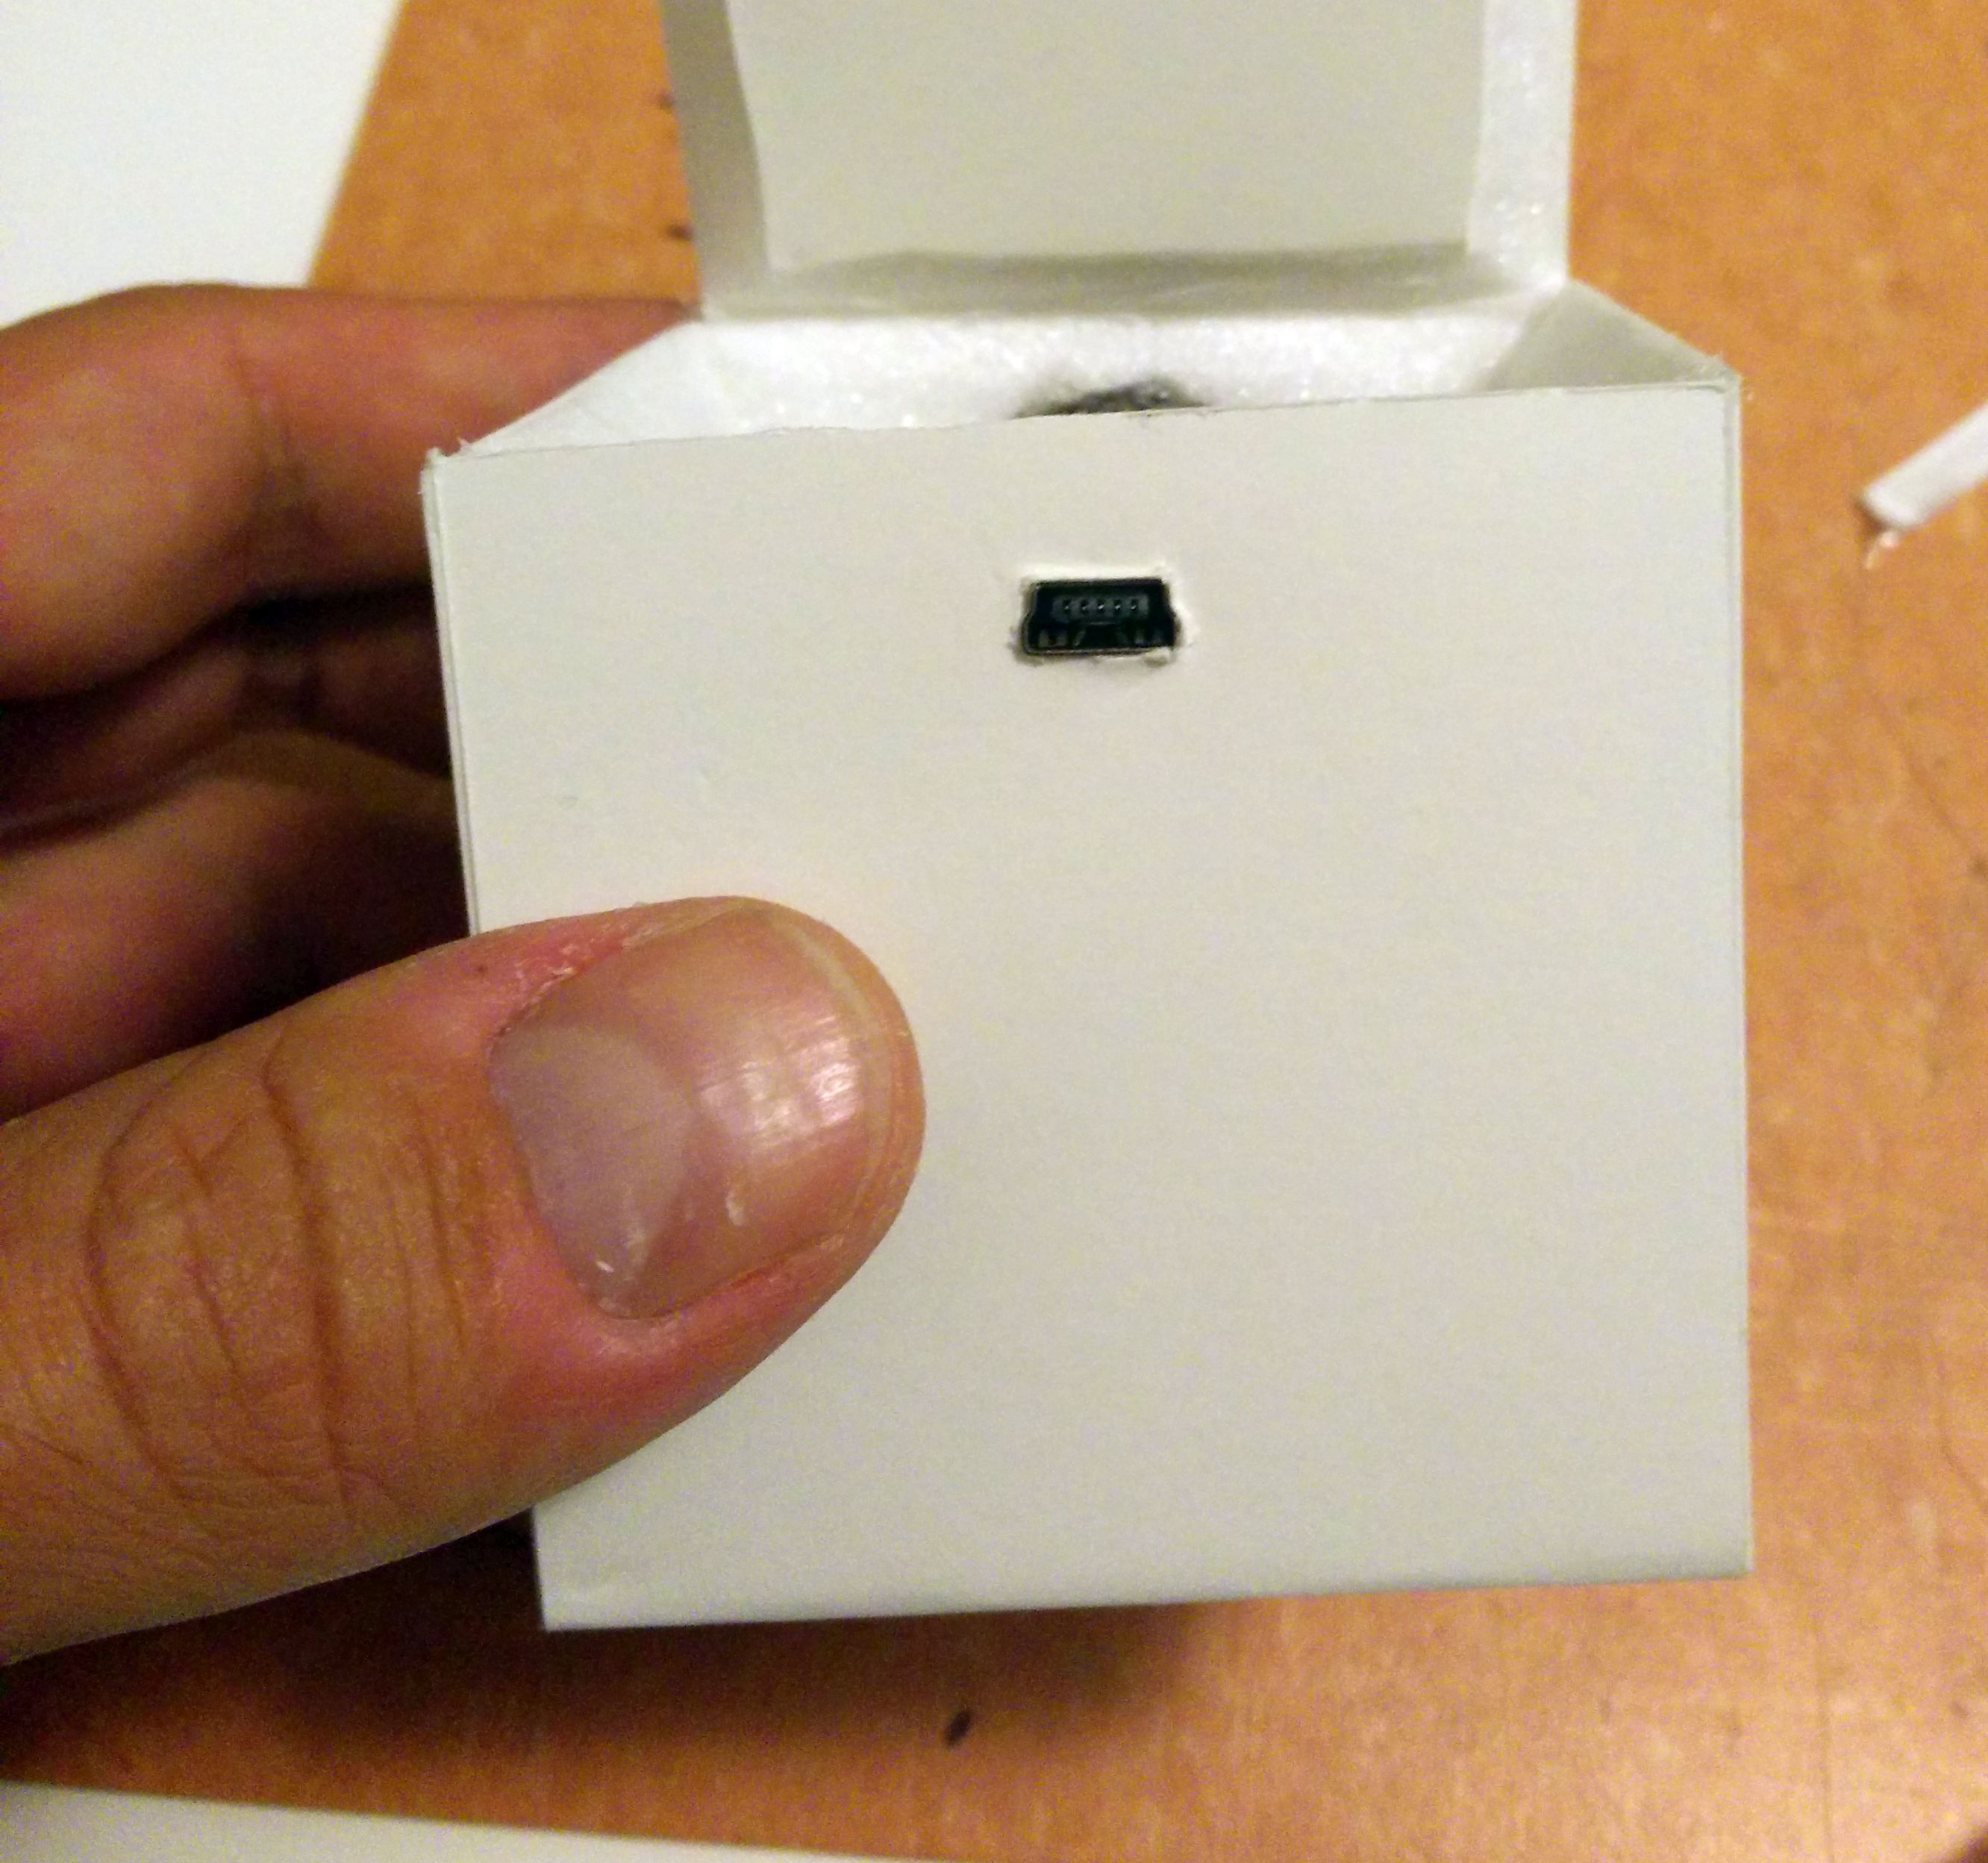
Finally, I added some magents in the lid to keep it closed and also put a USB connector in the back to power the device.

Files
Webpage Code: internetinternetMoodLight PhP CodeMoodLight
ESP8266 Code: internetMoodLight Arduino Code
Some final remarks and pictures
Overall, I am quite pleased with the outcome. the physical cube looks quite nice and clean and powering it even via the laptop USB port works well. What I do not like is that one cannot send the same color twice, that there is no backlog of sent colors and on the web end there is no feedback if the device is actually working. That prompted me to make version two that uses thingspeak as intermediate messenger.

1 thought on “Internet Mood Light”